
Overview
Integrating an Ubuntu server with Microsoft Active Directory (AD) enables centralized authentication and access control using domain credentials. While SSSD is commonly used, some enterprise environments prefer Winbind due to compatibility requirements, legacy setups, or advanced Samba integrations.
This guide explains how to join an Ubuntu server to an AD domain using realmd + Samba + Winbind
Prerequisites
Ensure the following before proceeding:
- Ubuntu Server (18.04 / 20.04 / 22.04 / 24.04)
- Reachable Active Directory Domain Controller
- DNS configured to use AD DNS servers
- Time synchronized with the domain (NTP)
- Domain account with permission to join computers
- Root or sudo access
Step 1 — Configure DNS to Use AD Domain Controller
Verify DNS settings:
cat /etc/resolv.conf
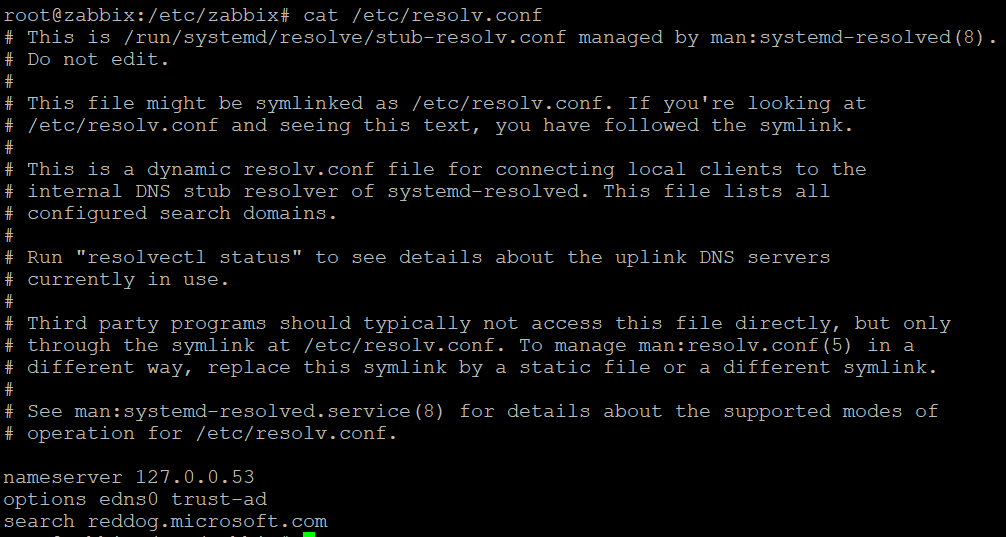
Ensure the nameserver points to your AD DNS server:
nameserver 192.168.1.10
search example.com
Test resolution:
nslookup example.com
nslookup dc01.example.com
Step 2 — Install Required Packages
Install realmd, Samba, and Winbind components:
sudo apt update
sudo apt install realmd samba

During installation, you may be prompted for the Kerberos realm — enter your domain in uppercase (e.g., EXAMPLE.COM).
In order to have the joined machine registered in the AD DNS, it needs to have an FQDN set. You might have that already, if running the hostname -f command returns a full hostname with domain. If it doesn’t, then set the hostname as follows:
sudo hostnamectl hostname <yourfqdn>
Step 3 — Discover the Domain
Verify domain availability:
sudo realm discover example.com
This should provide an output like this, given our setup:
internal.example.fake
  type: kerberos
  realm-name: example.com
  domain-name: example.com
  configured: no
  server-software: active-directory
  client-software: sssd
  required-package: sssd-tools
  required-package: sssd
  required-package: libnss-sss
  required-package: libpam-sss
  required-package: adcli
  required-package: samba-common-bin
Step 4 — Join the Domain Using Winbind
Run the join command specifying Samba and Winbind:
sudo realm join -v --membership-software=samba --client-software=winbind --user=Domainadmin example.com 
Step 5 — Verify Domain Join Status
Check domain configuration:
realm list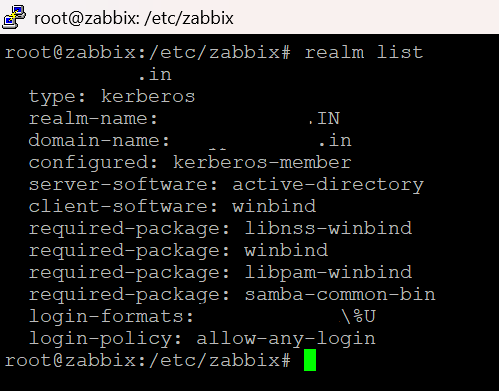
Step 6 — Test User Resolution
Verify that domain users resolve correctly:
getent passwd 'EXAMPLE\\username'
Check user identity:
id 'EXAMPLE\\username'
Step 7 — Configure Automatic Home Directory Creation
Enable home directory creation for domain users:
sudo pam-auth-update
Select:
👉 Create home directory on login
Step 8 — Restart Required Services
Apply configuration changes:
sudo systemctl restart smbd nmbd winbind
Verify Winbind status:
systemctl status winbind
Step 9 — Log In Using Domain Credentials
Users can log in using:
EXAMPLE\username
or depending on configuration:
username@example.com