Step-by-Step Guide to Setup LDAP and LDAPS on Windows Server

Create a VM named “ldapstest” Windows Server 2019 Datacenter
Connect to the VM ldapstest using Remote Desktop Connection.

Setup LDAP using AD LDS

Now let us add AD LDS in our VM ldapstest
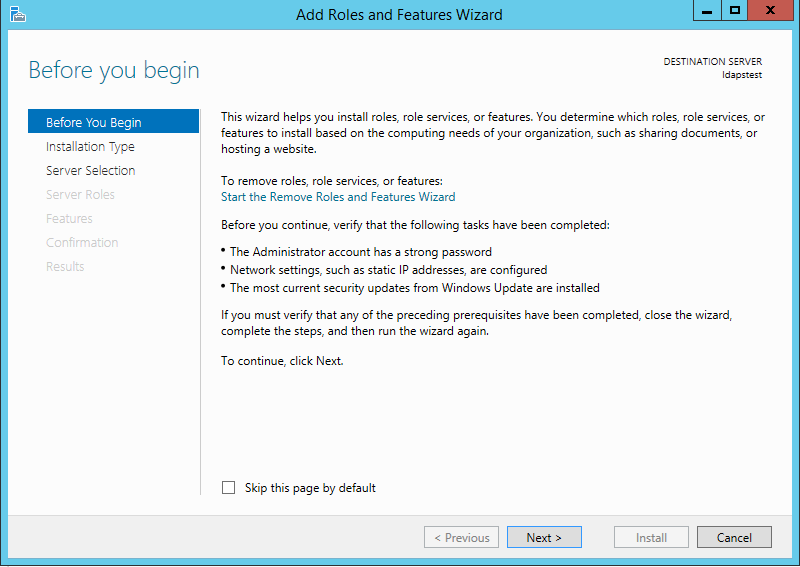
Click on Start –> Server Manager –> Add Roles and Features. Click Next.
thumbnail image 1 of blog post titled 


							Step by Step Guide to Setup LDAPS on Windows Server

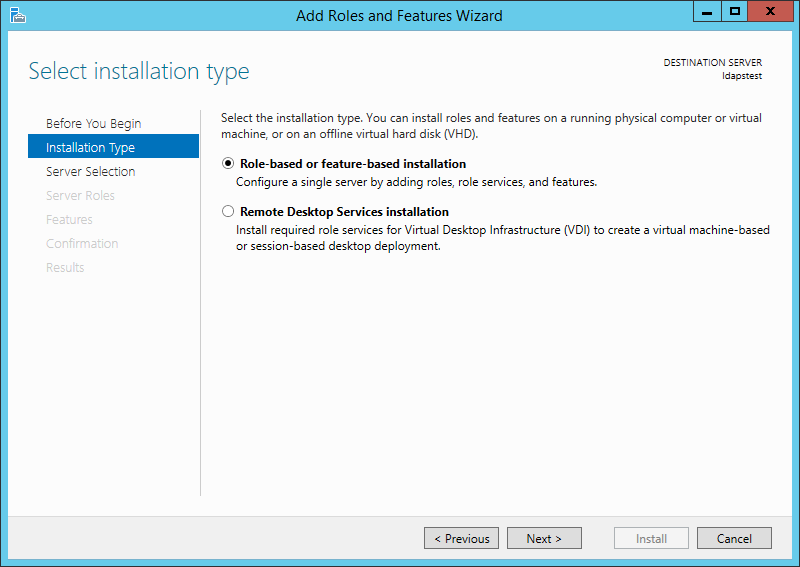
Choose Role-based or feature-based installation. Click Next.
thumbnail image 2 of blog post titled 


							Step by Step Guide to Setup LDAPS on Windows Server

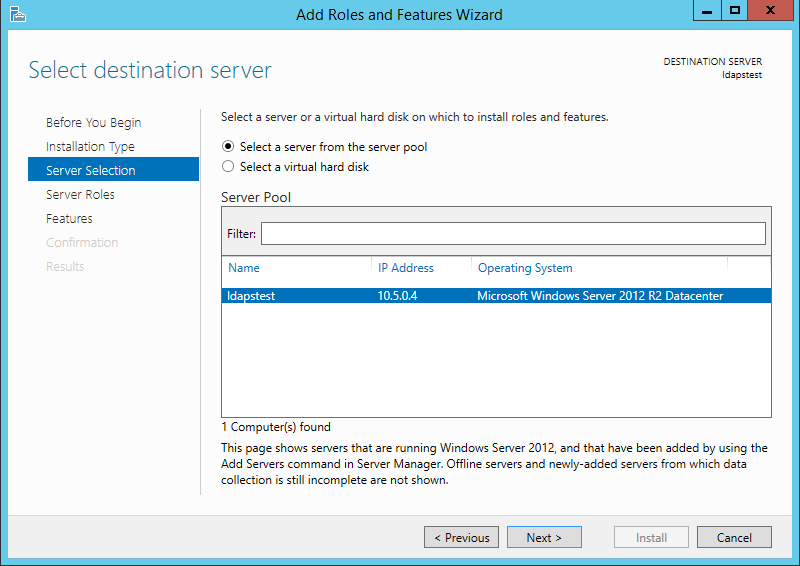
Select ldapstest server from the server pool. Click Next.
thumbnail image 3 of blog post titled 


							Step by Step Guide to Setup LDAPS on Windows Server

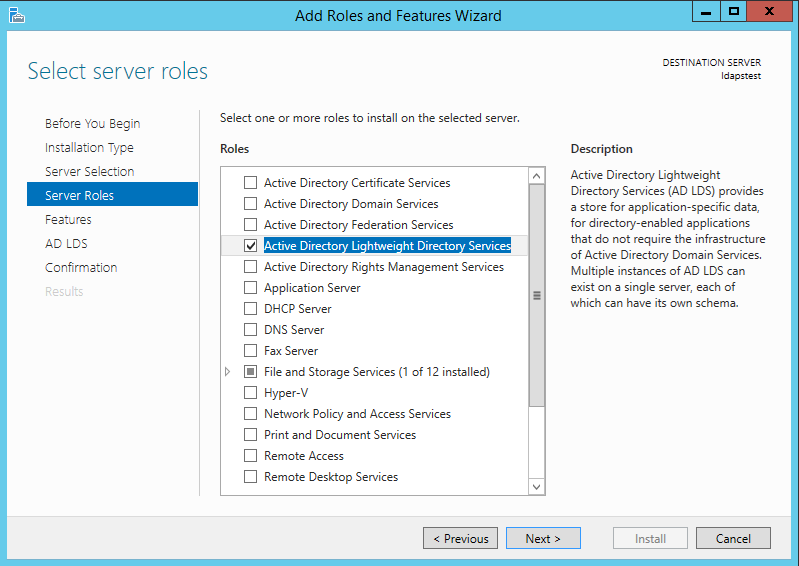
Mark Active Directory Lightweight Directory Services from the list of roles and click Next.
thumbnail image 4 of blog post titled 


							Step by Step Guide to Setup LDAPS on Windows Server

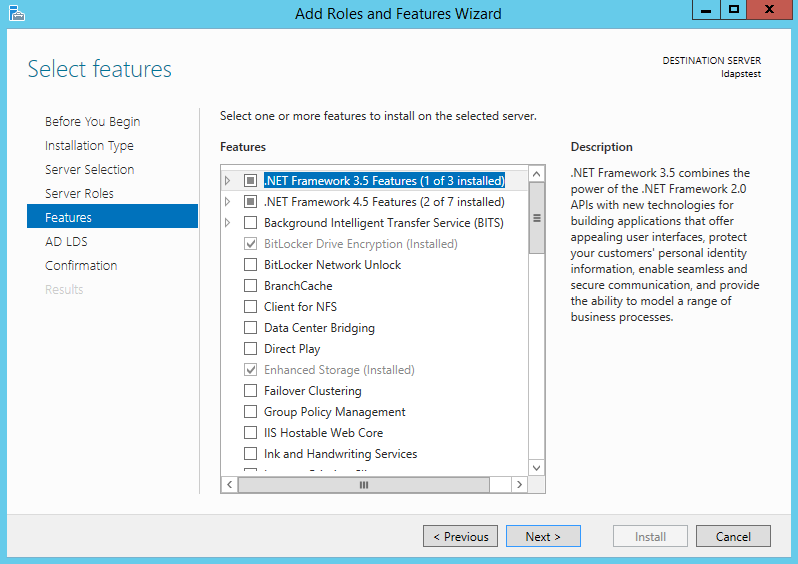
From the list of features, choose nothing – just click Next.
thumbnail image 5 of blog post titled 


							Step by Step Guide to Setup LDAPS on Windows Server

Click Next.

thumbnail image 6 of blog post titled 


							Step by Step Guide to Setup LDAPS on Windows Server

Click Install to start installation.

thumbnail image 7 of blog post titled 


							Step by Step Guide to Setup LDAPS on Windows Server

Once installation is complete, click Close.

thumbnail image 8 of blog post titled 


							Step by Step Guide to Setup LDAPS on Windows Server

Now we have successfully set up AD LDS Role. Let us create a new AD LDS Instance “CONTOSO” using the wizard. Click the “Run the Active Directory Lightweight Directory Services Setup Wizard” in the above screen. And then Click Close.

thumbnail image 9 of blog post titled 


							Step by Step Guide to Setup LDAPS on Windows Server

Choose Unique Instance since we are setting it up for the first time.

thumbnail image 10 of blog post titled 


							Step by Step Guide to Setup LDAPS on Windows Server

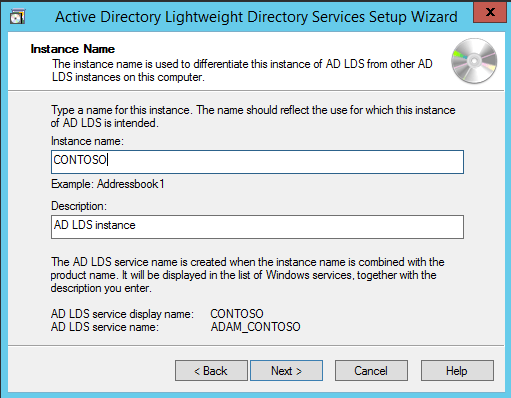
Type “CONTOSO” in Instance Name and click Next.
thumbnail image 11 of blog post titled 


							Step by Step Guide to Setup LDAPS on Windows Server

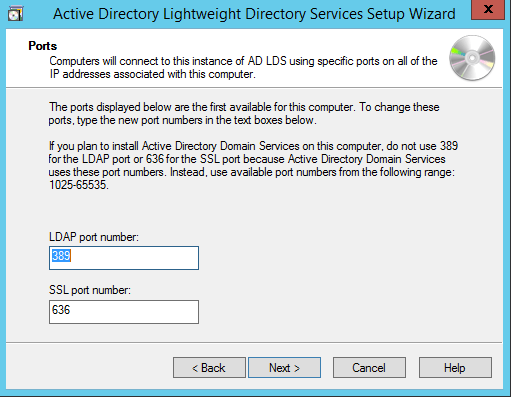
By Default, LDAP Port is 389 and LDAPS port is 636, let us choose the default values – click Next.
thumbnail image 12 of blog post titled 


							Step by Step Guide to Setup LDAPS on Windows Server

Create a new Application Directory Partition named “CN=MRS,DC=CONTOSO,DC=COM”. Click Next.

thumbnail image 13 of blog post titled 


							Step by Step Guide to Setup LDAPS on Windows Server

Using the default values for storage location of ADLDS files- Click Next.

thumbnail image 14 of blog post titled 


							Step by Step Guide to Setup LDAPS on Windows Server

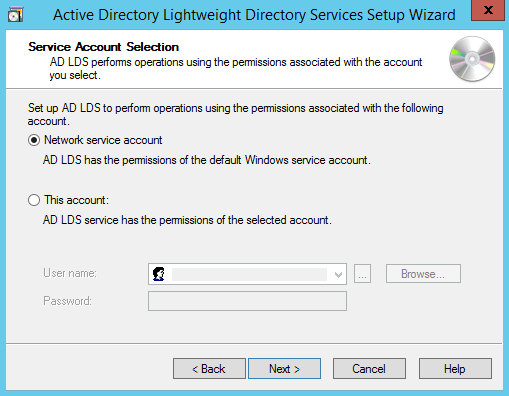
Choosing Network Service Account for running the AD LDS Service.
thumbnail image 15 of blog post titled 


							Step by Step Guide to Setup LDAPS on Windows Server

You will receive a prompt warning about data replication. Since we are using a single LDAP Server, we can click Yes.

thumbnail image 16 of blog post titled 


							Step by Step Guide to Setup LDAPS on Windows Server

Choosing the currently logged on user as an administrator for the AD LDS Instance. Click Next.

thumbnail image 17 of blog post titled 


							Step by Step Guide to Setup LDAPS on Windows Server

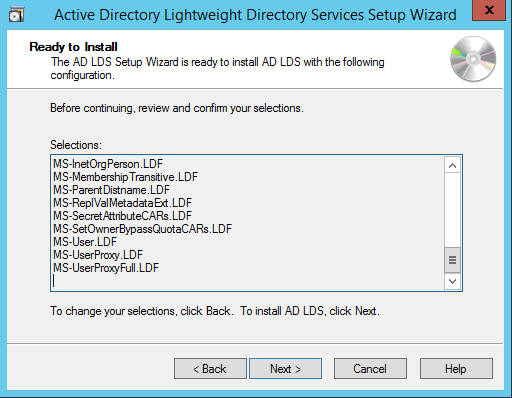
Mark all the required LDIF files to import (Here we are marking all files). Click Next.

thumbnail image 18 of blog post titled 


							Step by Step Guide to Setup LDAPS on Windows Server

Verify that all the selections are right and then Click Next to confirm Installation.
thumbnail image 19 of blog post titled 


							Step by Step Guide to Setup LDAPS on Windows Server

Once the instance is setup successfully, click Finish.

thumbnail image 20 of blog post titled 


							Step by Step Guide to Setup LDAPS on Windows Server

Now let us try to connect to the AD LDS Instance CONTOSO using ADSI Edit.
Click on Start –> Search “ADSI Edit” and open it.
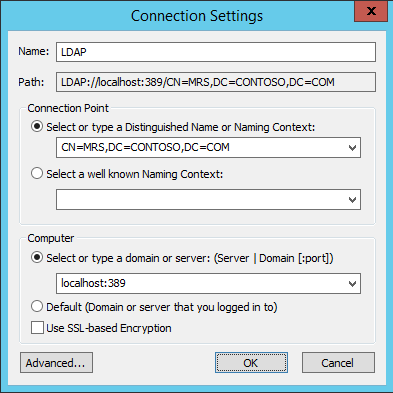
Right Click on ADSI Edit Folder (on the left pane) and choose Connect To.. . Fill the following values and Click OK.
thumbnail image 21 of blog post titled 


							Step by Step Guide to Setup LDAPS on Windows Server

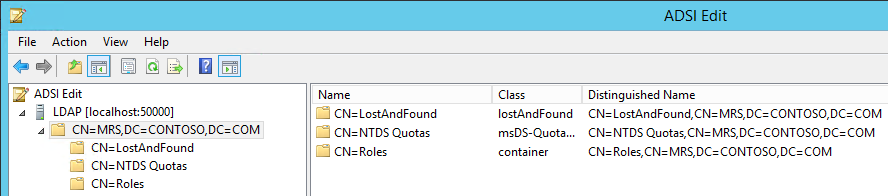
If the connection is successful, we will be able to browse the Directory CN=MRS,DC=CONTOSO,DC=COM :
thumbnail image 22 of blog post titled 


							Step by Step Guide to Setup LDAPS on Windows Server

Setup LDAPS (LDAP over SSL)

The Certificate to be used for LDAPS must satisfy the following 3 requirements:
• Certificate must be valid for the purpose of Server Authentication. This means that it must also contains the Server Authentication object identifier (OID): 1.3.6.1.5.5.7.3.1
• The Subject name or the first name in the Subject Alternative Name (SAN) must match the Fully Qualified Domain Name (FQDN) of the host machine, such as Subject:CN=contosoldaps. For more information, see How to add a Subject Alternative Name to a secure LDAP certificate .
• The host machine account must have access to the private key.

Now, let’s use Active Directory Certificate Services to create a certificate to be used for LDAPS. If you already have a certificate satisfying the above requirements, you can skip this step.

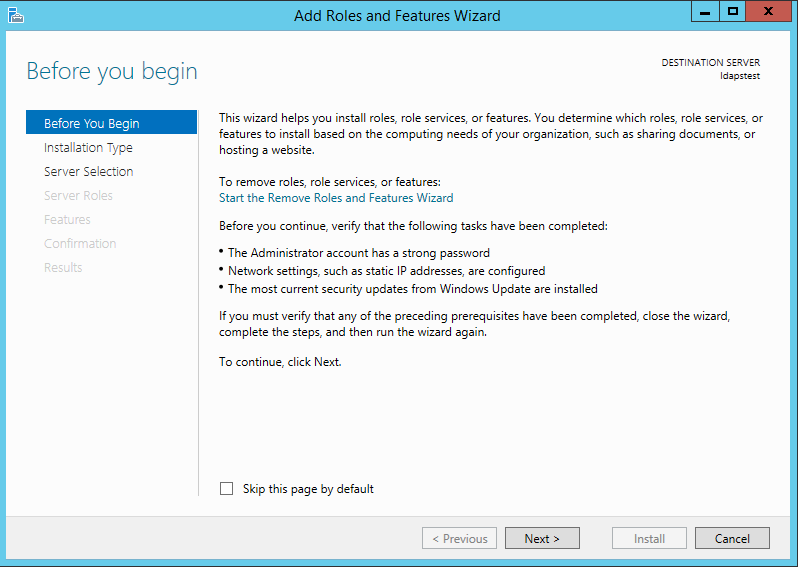
Click on Start –> Server Manager –> Add Roles and Features. Click Next.
thumbnail image 23 of blog post titled 


							Step by Step Guide to Setup LDAPS on Windows Server

Choose Role-based or feature-based installation. Click Next.

thumbnail image 24 of blog post titled 


							Step by Step Guide to Setup LDAPS on Windows Server

Select ldapstest server from the server pool. Click Next.

thumbnail image 25 of blog post titled 


							Step by Step Guide to Setup LDAPS on Windows Server

Choose Active Directory Certificate Services from the list of roles and click Next.

thumbnail image 26 of blog post titled 


							Step by Step Guide to Setup LDAPS on Windows Server

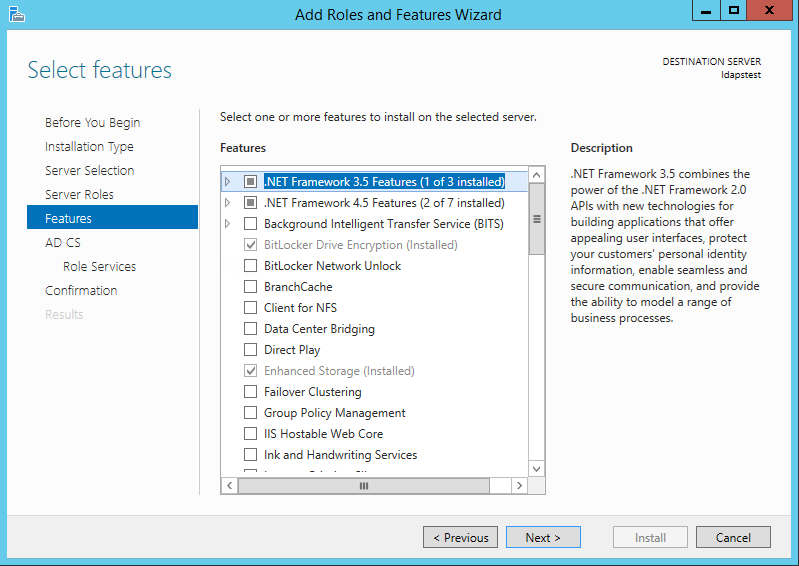
Choose nothing from the list of features and click Next.
thumbnail image 27 of blog post titled 


							Step by Step Guide to Setup LDAPS on Windows Server

Click Next.

thumbnail image 28 of blog post titled 


							Step by Step Guide to Setup LDAPS on Windows Server

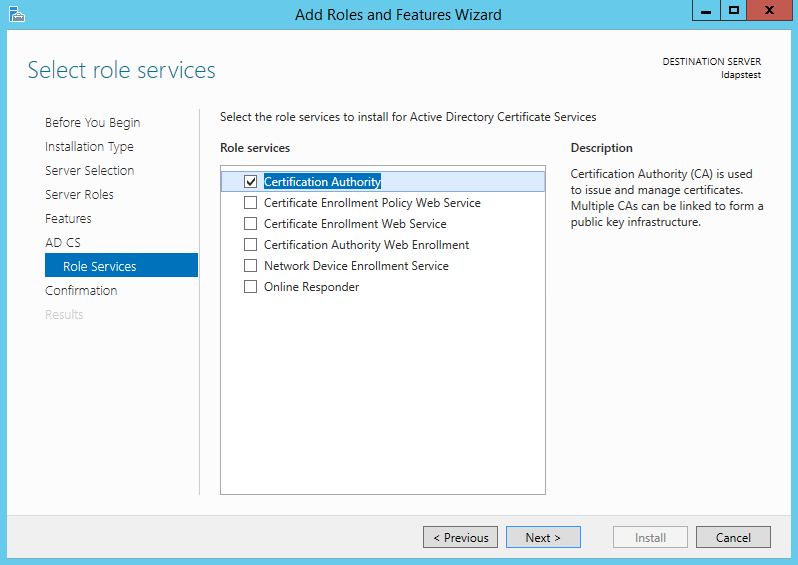
Mark “Certificate Authority” from the list of roles and click Next.
thumbnail image 29 of blog post titled 


							Step by Step Guide to Setup LDAPS on Windows Server

Click Install to confirm installation.

thumbnail image 30 of blog post titled 


							Step by Step Guide to Setup LDAPS on Windows Server

Once installation is complete, Click Close.

thumbnail image 31 of blog post titled 


							Step by Step Guide to Setup LDAPS on Windows Server

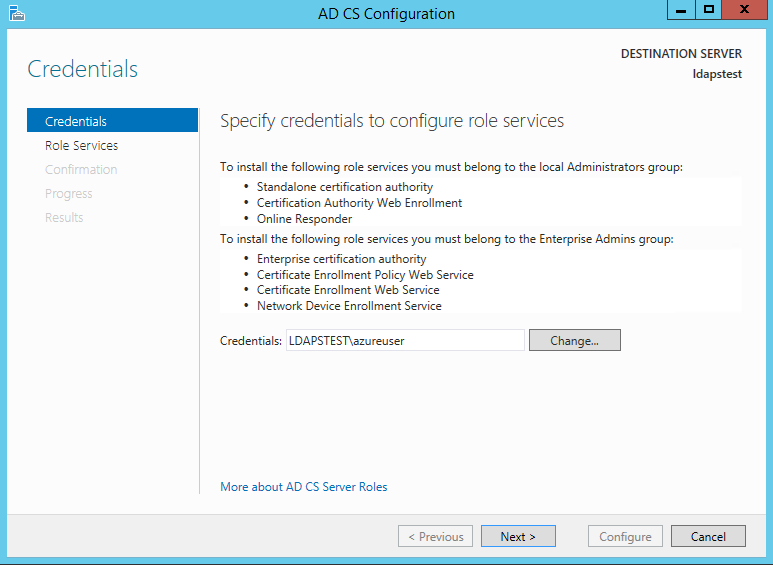
Now let’s create a certificate using AD CS Configuration Wizard. To open the wizard, click on “Configure Active Directory Certificate Services on the destination server” in the above screen. And then click Close. We can use the currently logged on user azureuser to configure role services since it belongs to the local Administrators group. Click Next.
thumbnail image 32 of blog post titled 


							Step by Step Guide to Setup LDAPS on Windows Server

Choose Certification Authority from the list of roles. Click Next.

thumbnail image 33 of blog post titled 


							Step by Step Guide to Setup LDAPS on Windows Server

Since this is a local box setup without a domain, we are going to choose a Standalone CA. Click Next.

thumbnail image 34 of blog post titled 


							Step by Step Guide to Setup LDAPS on Windows Server

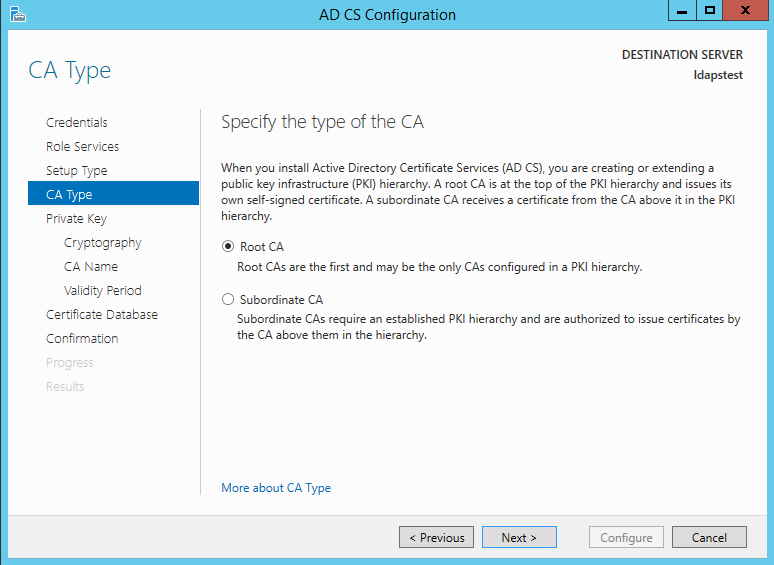
Choosing Root CA as the type of CA, click Next.
thumbnail image 35 of blog post titled 


							Step by Step Guide to Setup LDAPS on Windows Server

Since we do not possess a private key – let’s create a new one. Click Next.

thumbnail image 36 of blog post titled 


							Step by Step Guide to Setup LDAPS on Windows Server

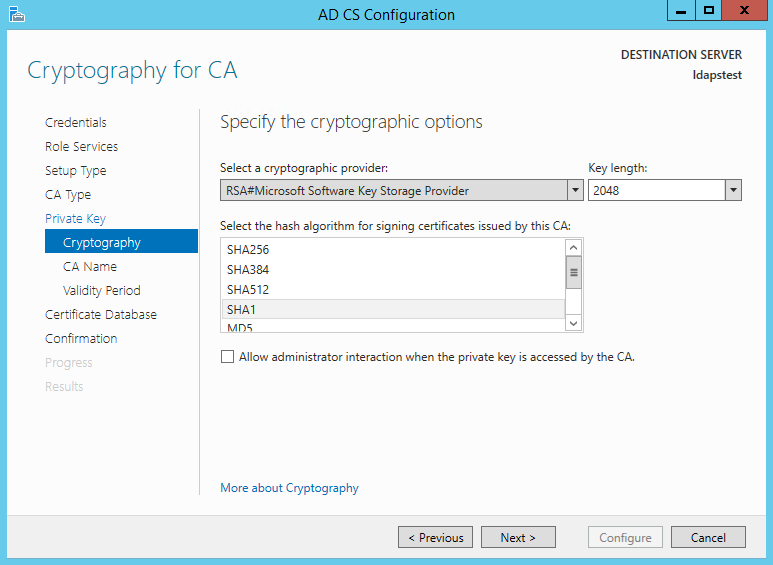
Choosing SHA1 as the Hash algorithm. Click Next.

UPDATE : Recommended to select the most recent hashing algorithm since SHA-1 deprecation countdown
thumbnail image 37 of blog post titled 


							Step by Step Guide to Setup LDAPS on Windows Server

The name of the CA must match the Hostname (requirement number 2). Enter “LDAPSTEST” and Click Next.

thumbnail image 38 of blog post titled 


							Step by Step Guide to Setup LDAPS on Windows Server

Specifying validity period of the certificate. Choosing Default 5 years. Click Next.

thumbnail image 39 of blog post titled 


							Step by Step Guide to Setup LDAPS on Windows Server

Choosing default database locations, click Next.

thumbnail image 40 of blog post titled 


							Step by Step Guide to Setup LDAPS on Windows Server

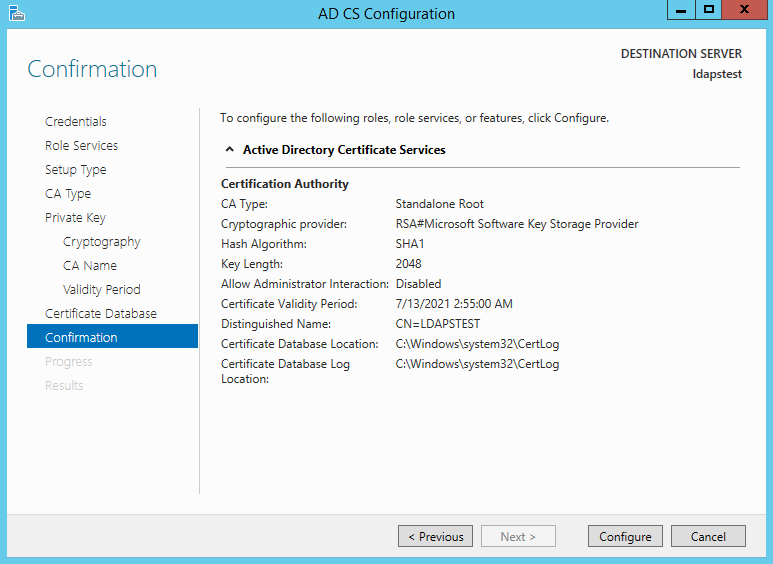
Click Configure to confirm.

thumbnail image 41 of blog post titled 


							Step by Step Guide to Setup LDAPS on Windows Server

Once the configuration is successful/complete. Click Close.

thumbnail image 42 of blog post titled 


							Step by Step Guide to Setup LDAPS on Windows Server

Now let us view the generated certificate.

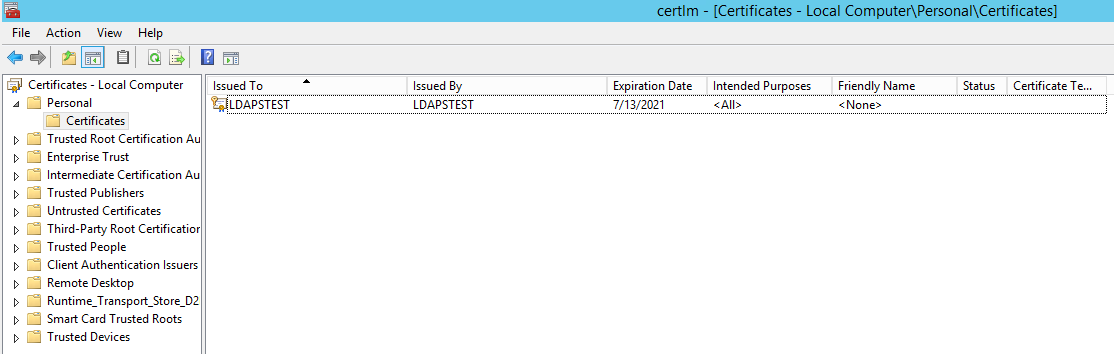
Click on Start à Search “Manage Computer Certificates” and open it.

Click on Personal Certificates and verify that the certificate “LDAPSTEST” is present:
thumbnail image 43 of blog post titled 


							Step by Step Guide to Setup LDAPS on Windows Server

Now to fulfill the third requirement, let us ensure host machine account has access to the private key. Using the Certutil utility, find the Unique Container Name. Open Command Prompt in Administrator mode and run the following command: certutil -verifystore MY

thumbnail image 44 of blog post titled 


							Step by Step Guide to Setup LDAPS on Windows Server

The private key will be present in the following location C:\ProgramData\Microsoft\Crypto\Keys\<UniqueContainerName>

Right Click C:\ProgramData\Microsoft\Crypto\Keys\874cb49a696726e9f435c1888b69f317_d3e61130-4cd8-4288-a344-7784647ff8c4 and click properties –> Security and add read permissions for NETWORK SERVICE.

thumbnail image 45 of blog post titled 


							Step by Step Guide to Setup LDAPS on Windows Server

We need to import this certificate into JRE key store since our certificate “CN=LDAPSTEST” is not signed by any by any trusted Certification Authority(CA) which is configured in you JRE keystore e.g Verisign, Thwate, goDaddy or entrust etc. In order to import this certificate using the keytool utility, let us first export this cert as a .CER from the machine certificate store:

Click Start –> Search “Manage Computer Certificates” and open it. Open personal, right click LDAPSTEST cert and click “Export”.

thumbnail image 46 of blog post titled 


							Step by Step Guide to Setup LDAPS on Windows Server

This opens the Certificate Export Wizard. Click Next.

thumbnail image 47 of blog post titled 


							Step by Step Guide to Setup LDAPS on Windows Server

Do not export the private key. Click Next.

thumbnail image 48 of blog post titled 


							Step by Step Guide to Setup LDAPS on Windows Server

Choose Base-64 encoded X .509 file format. Click Next.

thumbnail image 49 of blog post titled 


							Step by Step Guide to Setup LDAPS on Windows Server

Exporting the .CER to Desktop. Click Next.

thumbnail image 50 of blog post titled 


							Step by Step Guide to Setup LDAPS on Windows Server

Click Finish to complete the certificate export.

thumbnail image 51 of blog post titled 


							Step by Step Guide to Setup LDAPS on Windows Server

Certificate is now successfully exported to “C:\Users\azureuser\Desktop\ldapstest.cer”.

Now we shall import it to JRE Keystore using the keytool command present in this location:

C:\Program Files\Java\jre1.8.0_92\bin\keytool.exe.

Open Command Prompt in administrator mode. Navigate to “C:\Program Files\Java\jre1.8.0_92\bin\” and run the following command:
keytool -importcert -alias “ldapstest” -keystore “C:\Program Files\Java\jre1.8.0_92\lib\security\cacerts” -storepass changeit -file “C:\Users\azureuser\Desktop\ldapstest.cer”

thumbnail image 52 of blog post titled 


							Step by Step Guide to Setup LDAPS on Windows Server

Type “yes” in the Trust this certificate prompt.

Once certificate is successfully added to the JRE keystore, we can connect to the LDAP server over SSL.

Now let us try to connect to LDAP Server (with and without SSL) using the ldp.exe tool.

Connection strings for

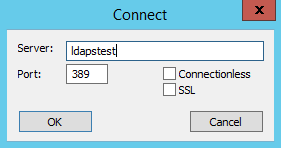
LDAP:\\ldapstest:389

LDAPS:\\ldapstest:636

Click on Start –> Search ldp.exe –> Connection and fill in the following parameters and click OK to connect:
thumbnail image 53 of blog post titled 


							Step by Step Guide to Setup LDAPS on Windows Server

If Connection is successful, you will see the following message in the ldp.exe tool:

thumbnail image 54 of blog post titled 


							Step by Step Guide to Setup LDAPS on Windows Server

To Connect to LDAPS (LDAP over SSL), use port 636 and mark SSL. Click OK to connect.

thumbnail image 55 of blog post titled 


							Step by Step Guide to Setup LDAPS on Windows Server

If connection is successful, you will see the following message in the ldp.exe tool:

thumbnail image 56 of blog post titled 


							Step by Step Guide to Setup LDAPS on Windows Server

Reference Links

AD LDS Getting Started Step-by-Step Guide

https://learn.microsoft.com/en-us/previous-versions/windows/it-pro/windows-server-2008-R2-and-2008/cc770639(v=ws.10)?redirectedfrom=MSDN

Configuring LDAP over SSL Requirements for AD LDS

https://learn.microsoft.com/en-us/previous-versions/windows/it-pro/windows-server-2008-R2-and-2008/cc725767(v=ws.10)?redirectedfrom=MSDN

LDAP over SSL (LDAPS) Certificate

https://learn.microsoft.com/en-us/archive/technet-wiki/2980.ldap-over-ssl-ldaps-certificate

For Troubleshooting LDAP Over SSL

https://learn.microsoft.com/en-us/archive/blogs/askds/troubleshooting-ldap-over-ssl

This post was created from the content found on the below link

https://techcommunity.microsoft.com/t5/sql-server-blog/step-by-step-guide-to-setup-ldaps-on-windows-server/ba-p/385362

Leave a Comment