
Commands to Manage IP Configuration in SAC
To work with the IP configuration, follow these steps:
1. Enter the Networking Context
SAC uses command channels for different contexts. To switch to the network management context, use:
SAC> cmdSAC> ch -si 1
This brings up the Command Line Interface of the Server.

2. View Network Interfaces
Within the SAC networking context, use below command
ipconfig
This command displays network adapters, IP addresses, and subnet masks.
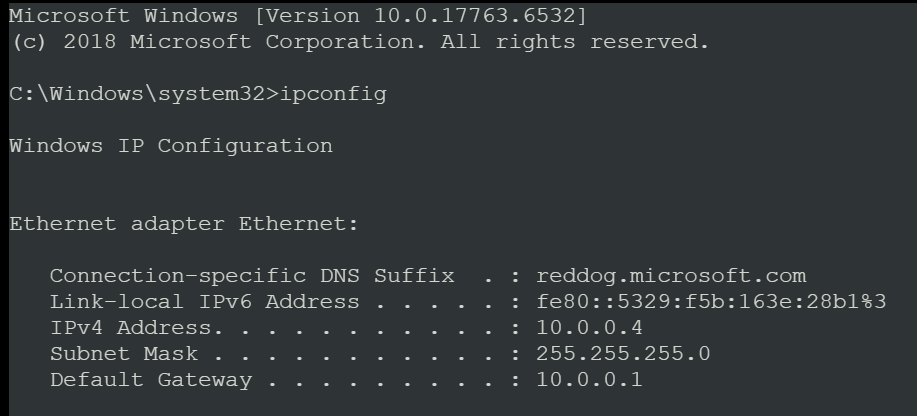
3. List All Network Interfaces
This will display all the network interfaces on the system with their Interface Name, Admin State, and Operational State.
netsh interface show interface Example Output:
Admin State  State          Type      Interface Name
-------------------------------------------------------------------
Enabled     Connected      Dedicated   Ethernet
From the output, you can identify the adapter name (e.g., Ethernet).

3. Modify Network Settings
To configure or modify IP settings in SAC:
Set a static IP address:
netsh interface ip set address name="<adapter name>" static <IP address> <Subnet mask> <Default gateway> Example:
netsh interface ip set address name="Ethernet" static 192.168.1.100 255.255.255.0 192.168.1.1Configure DNS servers:
netsh interface ip set dns name="<adapter name>" static <DNS server IP> Example:
netsh interface ip set dns name="Ethernet" static 8.8.8.8Reset to DHCP:
netsh interface ip set address name="<adapter name>" dhcp netsh interface ip set dns name="<adapter name>" dhcp4. Save Changes
After making changes, confirm the configuration:
ipconfig
5. Exit SAC
To exit the network configuration context and return to the main SAC prompt:
exit